

- Mineral Fusion Nail Polish Remover Review: Is It a Good Acetone Alternative? - November 23, 2022
- How to Find the Best Nail Polish Remover: Plus 3 Acetone Myths - May 25, 2022
- 23 Clear Nails Inspiration and Ideas: From Elegant to Edgy - May 25, 2022
With ombre being one of the most popular trends nowadays, it only makes sense that we will give you some red ombre nails inspiration and ideas. You can do ombre with any color out there, and red is the perfect color for holidays, a darker look, or if you want to stand out a bit.
Ombre is a trend that I had never heard of until a year into my cosmetology career. That was nine years ago, and I still get clients coming into the salon and requesting it regularly. With ombre’s easy growth, uniqueness, and it being deceptively easy to achieve, it makes sense why it has lasted all these years.
Red Ombre Nails Inspiration Up Front
- Red Ombre to Nude
- Red Ombre to Another Color
- Red Glitter Ombre
- Vampire Ombre
- French Tip Red Ombre
- Designed Red Ombre
- Vertical Red Ombre
- Matte Red Ombre
- Gradient Red Ombre
- Marble Red Ombre
What Are Ombre Nails?
Ombre nails are when one color of polish blends into another color seamlessly. The trend started ten years ago and spread into everything fashion quickly, from clothing to nails. Ombre nails’ advantage is that they can last a lot longer than other painting trends because they blend into your natural nail color, which means the grow-out is a lot less noticeable.
Even though ombre nails look like a complex technique, they are pretty easy to achieve, and you can do them in many different styles. You can do a natural-looking ombre, multiple colors ombred together, designs with ombre, etc. Skip to the “How to Ombre Your Nails with Regular Polish” section below to see how you can do your ombre at home.
Selection Criteria for Red Ombre Nails
Trendy
Ombre is a difficult design not to make trendy, so it was pretty easy to find current red ombre nails inspiration. It has been around for quite a while now and has never faded out. Red is explicitly a bold color that you can always make trendy.
Can Be Done At Home
Contrary to what it may look like, ombre is a reasonably attainable look from home. You need a little know-how, some practice, and maybe some patience. To see the exact steps on doing red ombre nails at home, scroll down to “How to Ombre Your Nails with Regular Polish” below.
Can Be Worn Anywhere
No matter what event you have coming up, there is at least one red ombre nails idea on this list that will go with it. Even though it is such a bright and bold color, you can tame it down for special events, and it doesn’t take much to spice it up for the more wild events either.
Red Ombre Nails Inspiration
The color red is precisely a good color for ombre because it is a primary color, which means it can be mixed flawlessly with many colors and stands out. Below you will see what I am talking about with these red ombre nail ideas.
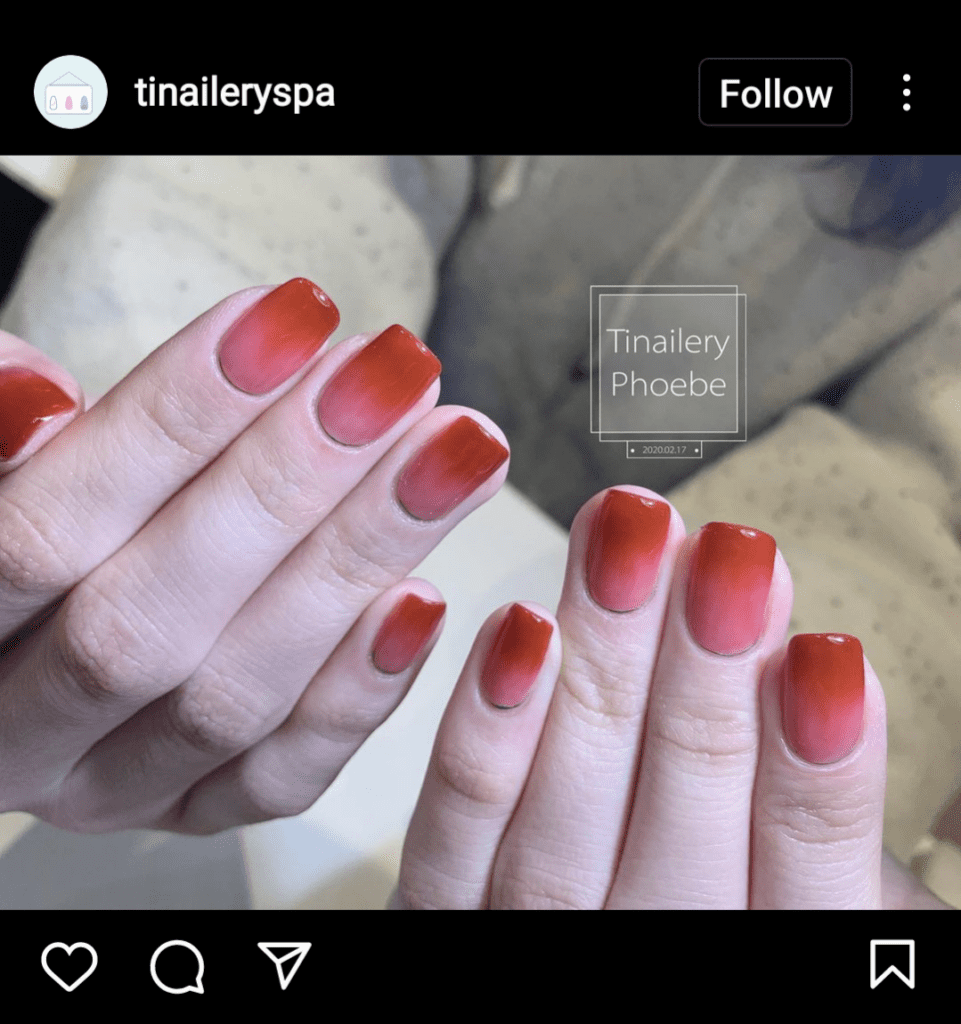
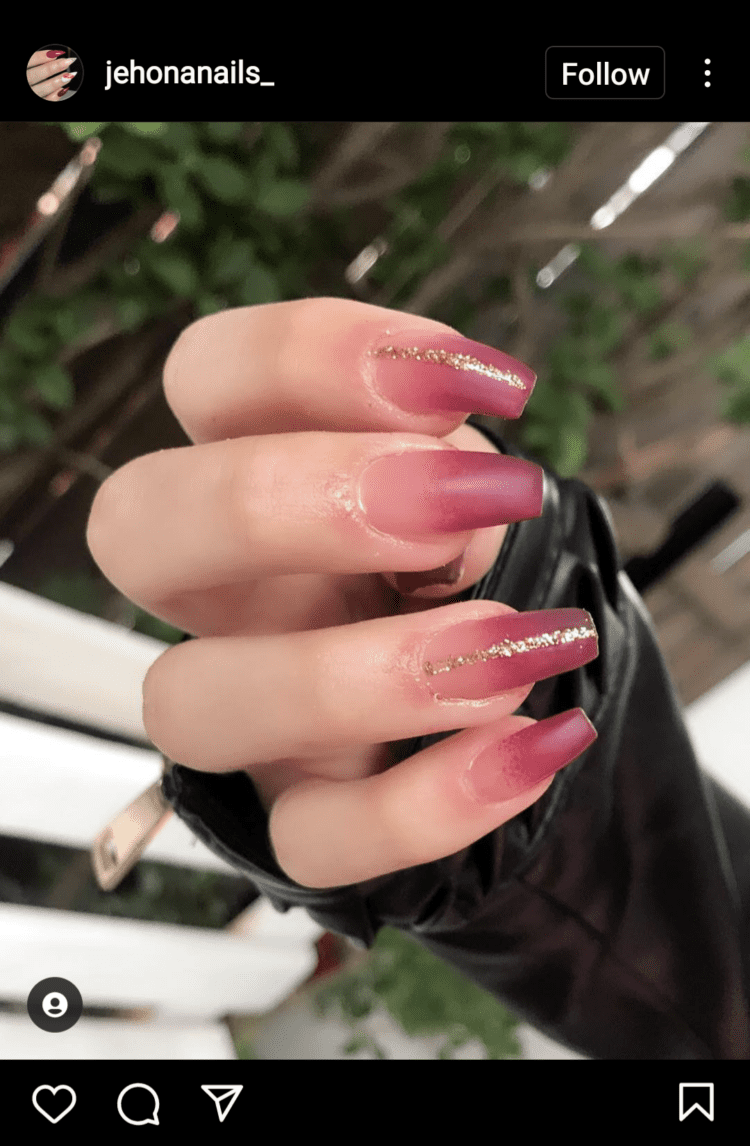
Red Ombre to Nude
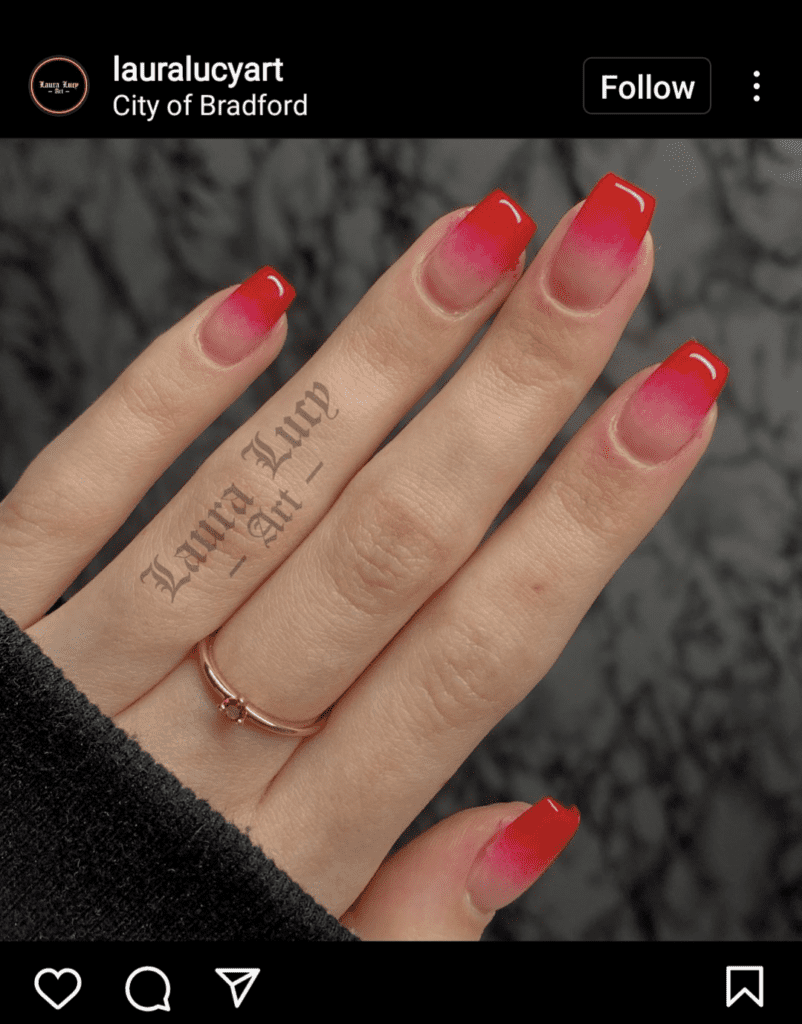
If you are looking for an ombre solely so your manicure will last longer than usual, this is the way to go. Red ombre is the new take on a red french tip. It tames down the red by blending it into a nude if you’re worried about the color being too bright. Also, you will go more weeks out of your manicure if you are doing acrylic since the base nude will blend in with your natural nail.
A red ombre to nude can be as bright or minimal as you want. It all depends on where you start the ombre. If you have most of the nail red and a small portion at the bottom ombre to nude, it will be brighter and stand out more. The red ombre will be less noticeable if you only make the very end of your nail red and slightly ombre it to a primarily nude nail.
Red Ombre to Another Color
If red isn’t enough of a pop of color for you, add another color to ombre the red into for something even brighter. Red ombre to another color is a great way to represent a holiday, a sports team, or merge your two favorite colors. You could even ombre together more than two colors if you feel up to it, like red, purple, and blue.
You could blend red into pink for Valentine’s Day or red into white and blue for the Fourth of July for holiday nails. Be careful when mixing green and red for Christmas. Green and red are complementary colors, meaning when you combine them, they turn a muddy color. Try to ombre green polish into a red glitter instead.
Red Glitter Ombre
Glitter is one of the easiest things to ombre into another color. You can ombre a plain glitter into a red polish or red glitter into whatever color polish you choose. Glitter can start from the bottom and fade up to the tip or start at the tip and fade to the base of the nail.
Ombre glitter is a bit different than to ombre a regular polish. You want to use glitter with a clear base polish, like Zoya Pixie Dust or Cirque Colors. Then start painting your glitter where you want the most glitter to be.
If it’s the tip, paint the glitter down your nail toward the base. Paint the glitter in layers, stopping slightly before where you stopped previously. Continue painting and moving the glitter until it fades into a full glitter, and finish with a topcoat.
Vampire Ombre
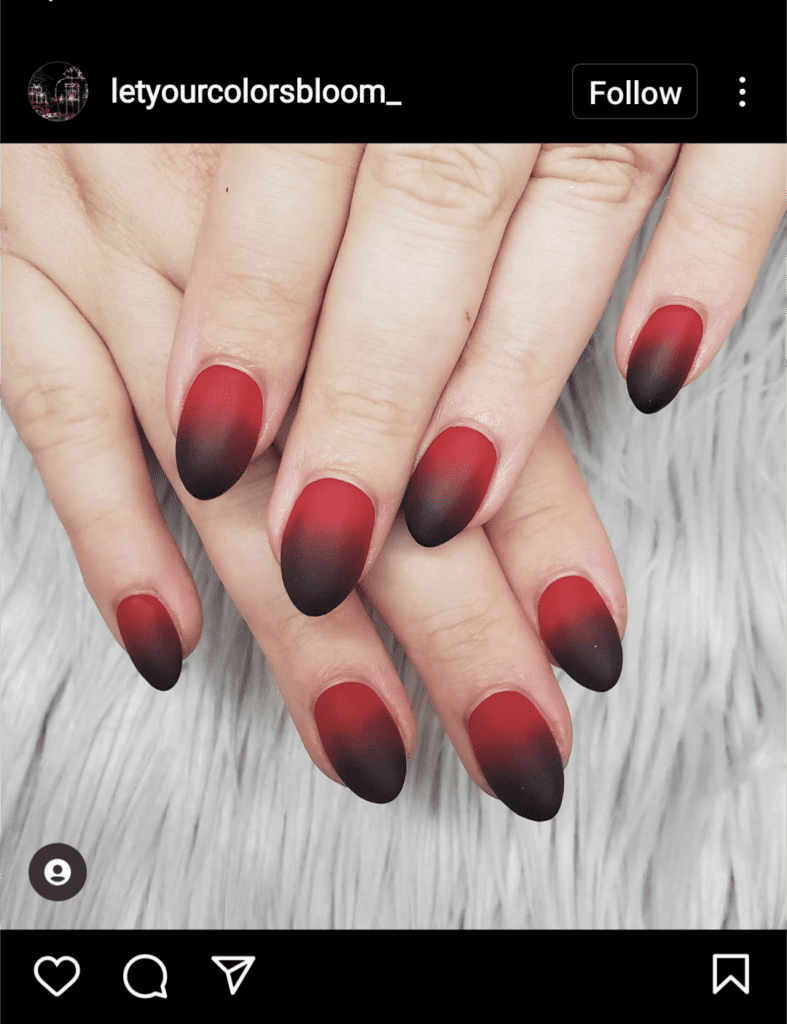
Red ombre faded into black is what I like to call vampire ombre. It’s dark and almost spooky looking, like a vampire. This look is perfect for Halloween or if you have a darker side to you. It’s also an excellent style for those that want to go for more of a punk look.
You can do a vampire ombre with the base painted black faded up to red or vice versa. You can also choose if you want more black on the nail for a darker look or more red for a brighter look. With this look, you can finish off your vampire ombre with a matte topcoat for a little more edge.
French Tip Red Ombre
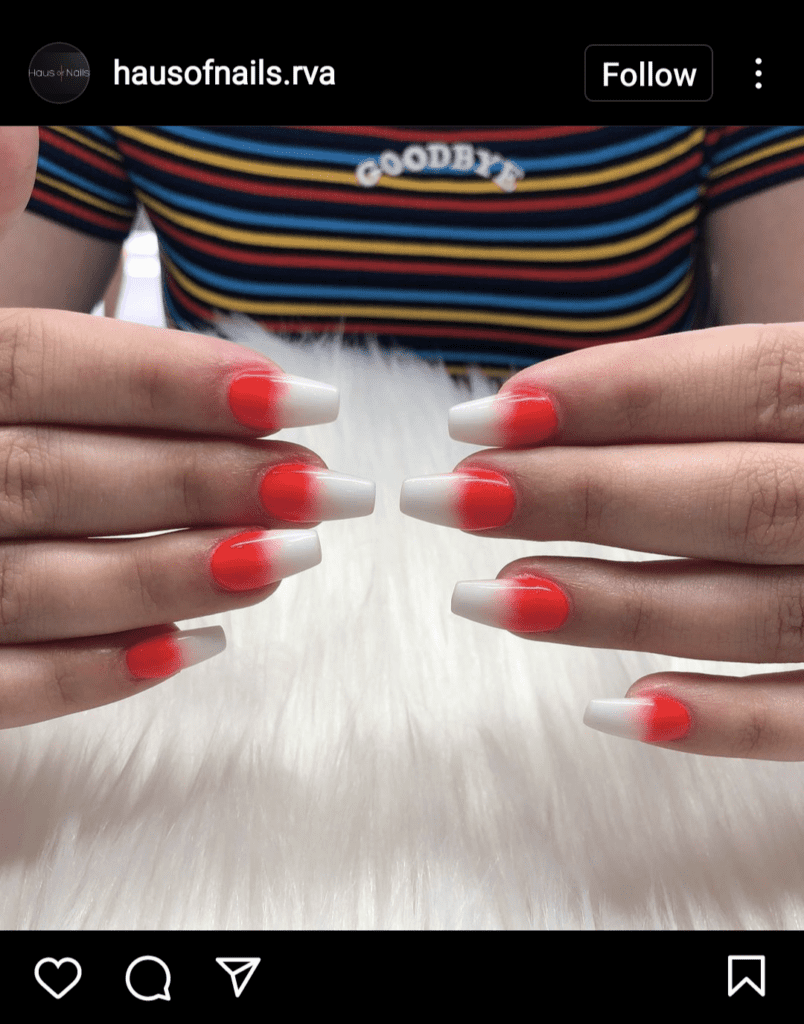
A french tip red ombre is like an inverted ombre. The tip of your nail is painted white and then red is blended up to the top from the bottom. This look is a great Christmas design, or if you want something slightly different from what the average crowd goes for.
The easiest way to achieve this look is by painting the whole nail white before starting, and this ensures that the red will more evenly blend up into the tip. For the rest of the steps to achieve this look, scroll down to the how-to section of this article.
Designed Red Ombre
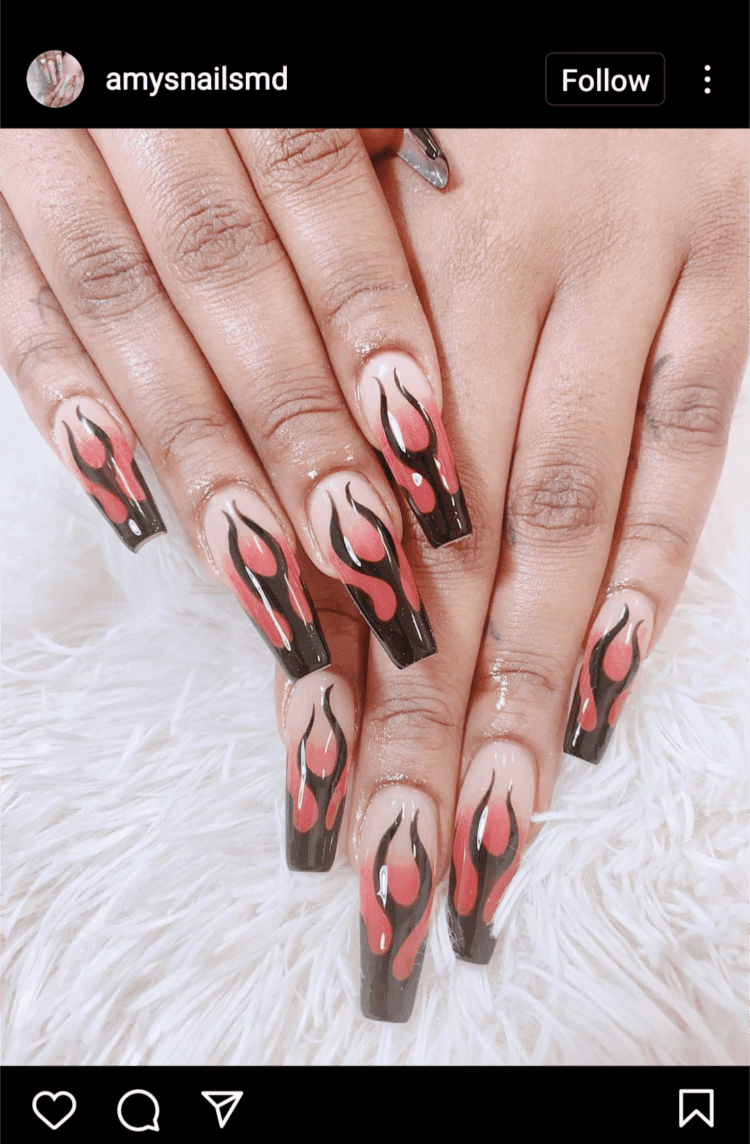
Painting a cute design over an ombre works well since there is no definite line that could obstruct your nail art. It also gives your red ombre nails more character than regular red ombre nails. You want to make sure that your second color is lighter or similar to red so you do not overwhelm your chosen design.
Some fun design ideas for red ombre nails are hearts, snowflakes, floral, or flames. You could do a wide range of designs for different occasions, like Valentine’s Day, vacation, or a winter set. The best color to do with your red ombre is nude, so your design pops.
Vertical Red Ombre
Instead of your ombre being horizontally painted on your nail from base to tip, you can also have a vertical ombre that fades from side to side. This look tends to make your nails look monochrome almost. You could also do a nail gradient with a vertical red ombre where each nail starts as the color of the last nail and fades into a lighter color.
The best way to do this look is not by using different colors but by using very similar colors or different shades of red. Doing this will give you that monochrome look that you look for with a vertical ombre, and it will also make it much easier to do a gradient between nails if that is what you are looking for.
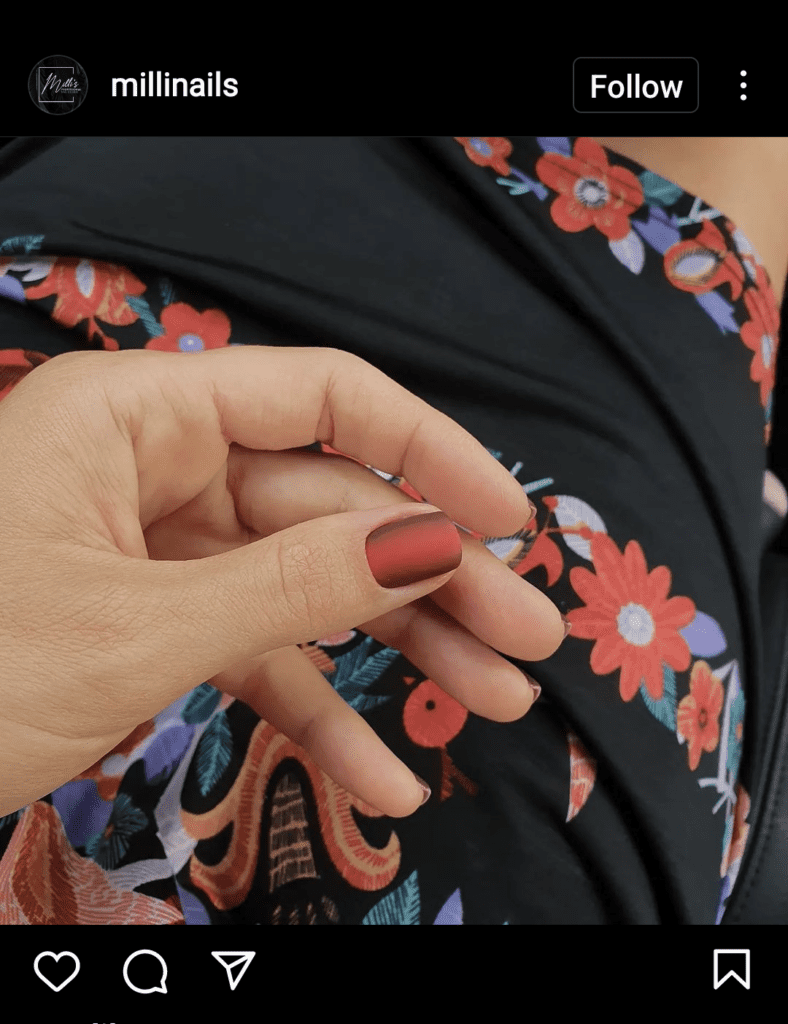
Matte Red Ombre
Red ombre does very well with a matte look because it is a darker color. The matte look gives your manicure more of a darker, punk style instead of a bright, happy one. It’s a little edgier than your standard shiny nails and gives your red ombre the twist it needs to make it stand out.
To do a matte red ombre, you need a matte topcoat, such as OPI Matte, Sally Hansen Big Matte, or Essie Matte About You. The rest of the ombre is done the same way you usually would. Darker colors tend to look good with a matte topcoat, so you want to choose a darker red, purple, black, or any other dark color to go with your matte red ombre.
Gradient Red Ombre
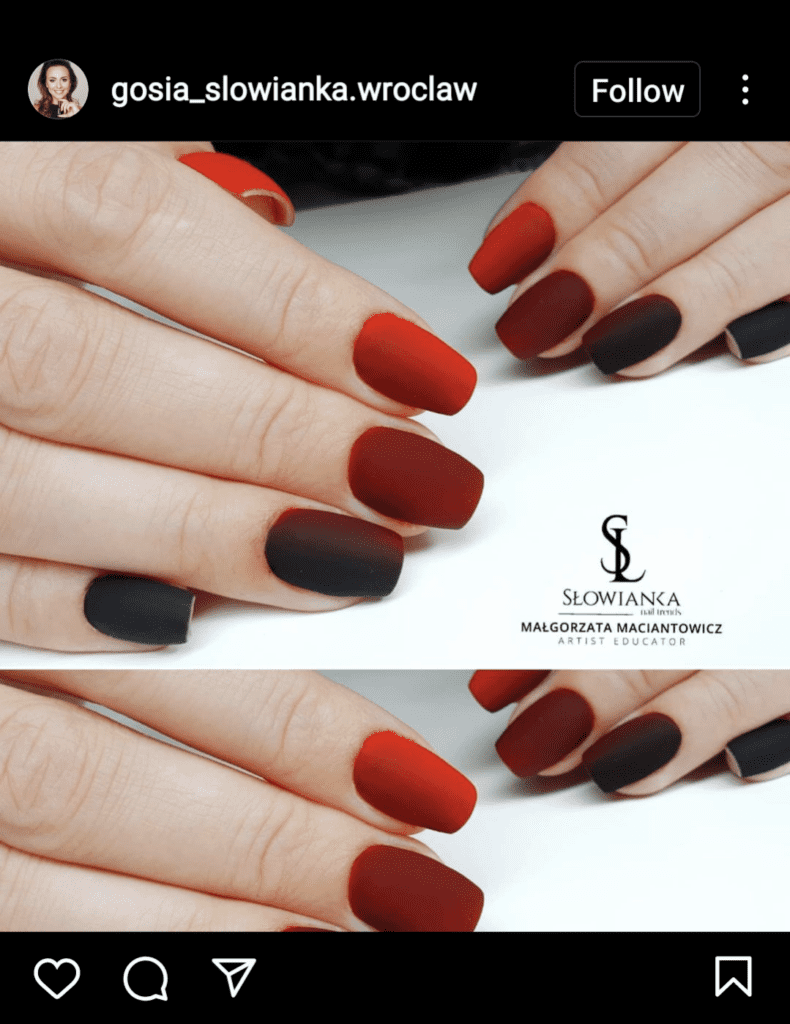
The gradient trend is a newer idea that started only a year or two ago. Gradient nails where you paint each nail only a slightly different color from the last so that each nail blends into the next. Doing this is especially fun with ombre because you can do a vertical ombre on each nail for the colors to melt together. You can also do each nail a different color with a normal horizontal ombre.
With a gradient red ombre, there are a few ways you can do it. You can either have your colors going from black to bright red or dark red to white. Also, you could have them blend into purple or orange. As mentioned above, you can also decide if you want your gradient to blend or be separate.
Marble Red Ombre
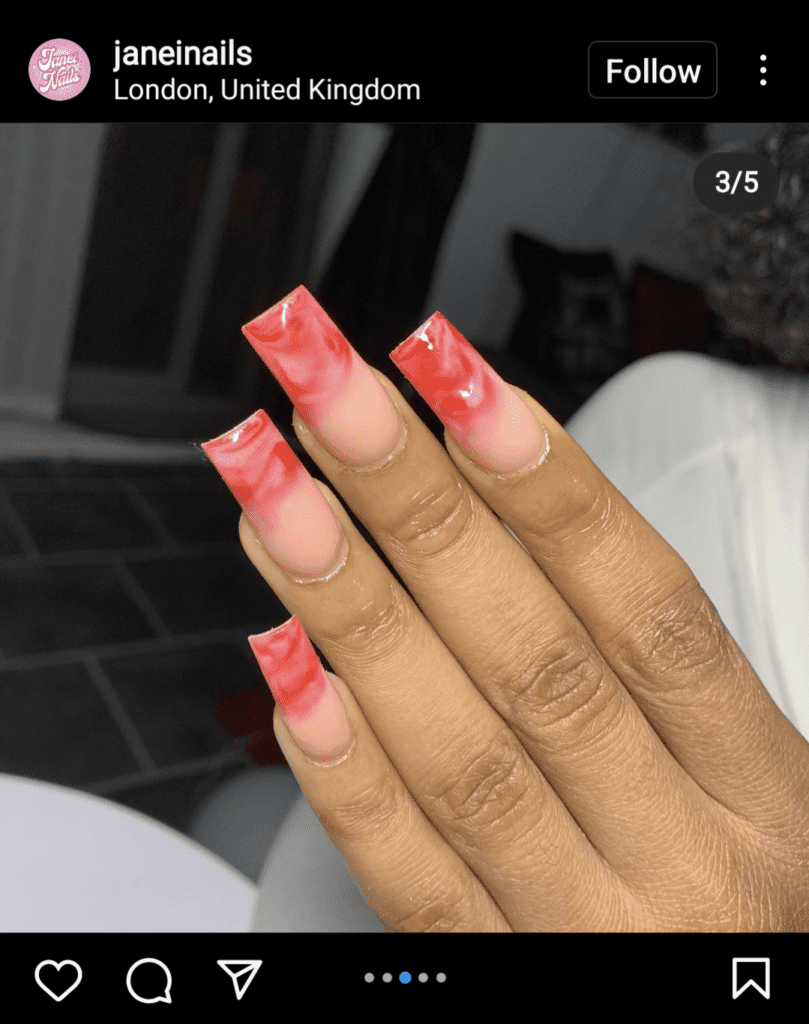
Marble is a texture that represents wealth and class. It has recently hit the fashion world and became as popular as the cheetah print in the ’90s. Even though marble is primarily white, you can do a marble look with red and white. You can also throw some gold flakes in there to make it pop.
Red marble tips can be ombred into a nude color or the shade of red used in the marble. This technique takes a little more skill and know-how, so it is best to have this done in the salon. It also tends to look better on fake nails or longer nails because short nails don’t have enough space to get the full effect of the design.
How to Ombre Your Nails with Regular Polish
What’s Needed
- Disposable makeup sponges
- Liquid latex or scotch tape
- Chosen nail polish colors
- A topcoat
Paint On the Lighter Color
Before you paint on the ombre, you should first paint your entire nail with your chosen lighter color. Doing this will ensure that there will not be any holes in color or translucent spots when you go over it with your darker ombre color. Do a double coat and make sure this layer is completely dry before moving on.
Protect Your Skin
Before starting the ombre process, you want to surround your entire nail in liquid latex or scotch tape, and this will keep your skin from getting polish all over it. This process gets super messy, and you will get polish all over your skin without this step.
Paint On the Darker Color
Once your first color is completely dry, paint on your darker color only to where you want the ombre to start. This could be halfway down the nail, just at the tip, or on one side. Don’t worry about the line being perfect or fading in just yet. Do this quickly, though, so the polish does not dry.
Blend Out the Line
Immediately after you paint on your second color, take your makeup sponge and dip it in the same color. You want the sponge to be saturated but not soaked. Start dabbing the sponge over the line, slowly moving down the nail into the lighter color. Do this until the line is sufficiently blended out.
Finish With a Topcoat
The sponge dabbing process makes your polish look textured and matte, so you need a topcoat. Before applying the topcoat, clean off any polish that may have gotten around the nail with a q-tip or nail brush dipped in acetone. Apply your topcoat like you usually would, rather it’s matte or shiny.
FAQs
Answer: In short, you’ll need your chosen polishes, a makeup sponge, and some skin protector. Paint your whole nail the lighter color first, and then go over half the nail with the darker color. Take your makeup sponge dipped in the darker polish and start dabbing out the line until it’s blended. Finish with a topcoat.
Answer: Yes, you can! It is done using the same method as regular polish, and the only difference is you want to paint the colors on top of the sponge rather than paint them on your nails first. With gel’s different consistency, it works better to paint the sponge and then dab it on.
Answer: You can use as many colors as you can fit on ombre nails. The more colors you add, the more difficult it becomes to blend them out since there is not as much space. However, you could do the entire rainbow on your nails if you desire.
Answer: The only color I recommend staying away from with red ombre nails is green. Mixing red and green together makes a muddy, gross color. With ombre, what you are doing is combining the two colors. If you want red and green ombre nails, I recommend making one of the colors a glitter polish, so they don’t mix.
Answer: This depends on the type of manicure you get and how many colors you want. A basic ombre can cost $35 to $45 with regular polish in the salon, and add $10 to $15 to that price for gel polish.
Should You Try Red Ombre Nails?
Red ombre nails are pretty easy to achieve yourself and very versatile in how you can do them. They can give you a red nail without going over the top with an entire red nail. You could also make a red ombre stand out more than most nail designs.
It is also really nice that a red ombre manicure can last longer than most other manicures. Red can make grow out more noticeable than any other color, so blending it into your natural is a great benefit. However, there are so many ways to wear a red ombre nail that you will find a style that you love.
Continue reading:
Ombre Nails Inspiration and Ideas